Using FlashAir W-04
Set the connection destination
-
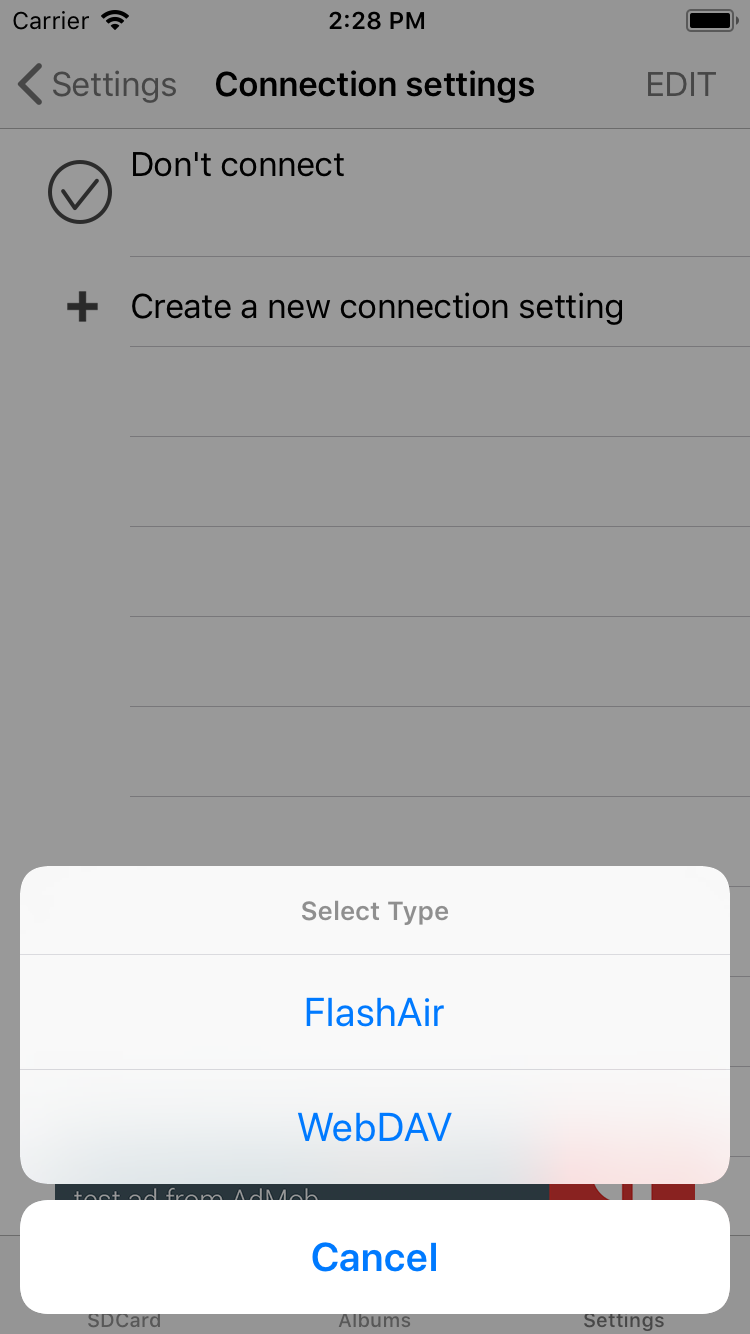
Choose Settings tab -> Connection settings -> Create a new connection setting
-
Please enter Wifi setting of FlashAir in ComeOnRAW. AP mode of wireless LAN mode (APPMODE) can be used (APPMODE value: 0, 3, 4, 6).
-
Select the connection destination on the setting tab of ComeOnRAW and select FlashAir from “Create a new connection”.

-
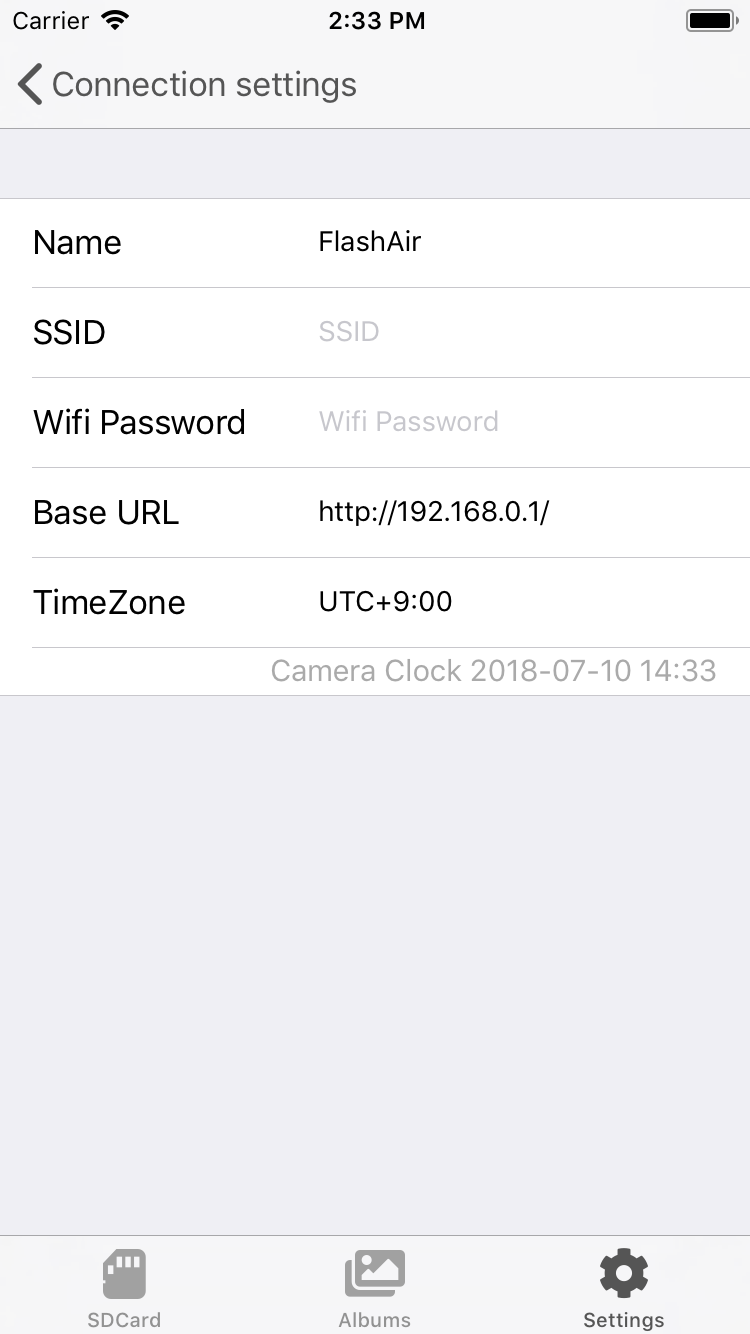
Please enter the FlashAir Wifi setting in the form. The input value differs depending on whether it is AP mode or simultaneous connection mode.

| ComeOnRAW | FlashAir |
|---|---|
| Name | Name to be displayed on the screen |
| SSID | AP mode: APPSSID of the setting. Simultaneous connection mode: BRGSSID of setting. |
| Wifi Password | AP mode: Setting APPNETWORKKEY. Simultaneous connection mode: BRGNETWORKKEY of setting. |
| Base URL | http://192.168.0.1/ |
| TimeZone | Specify the same time zone as the camera’s time zone (※) |
*: Specify the time zone so that the date and time displayed on the Camera Clock of ComeOnRAW and the camera date and time are the same. By default it will be the time zone set on the iPhone / iPad.
Connect
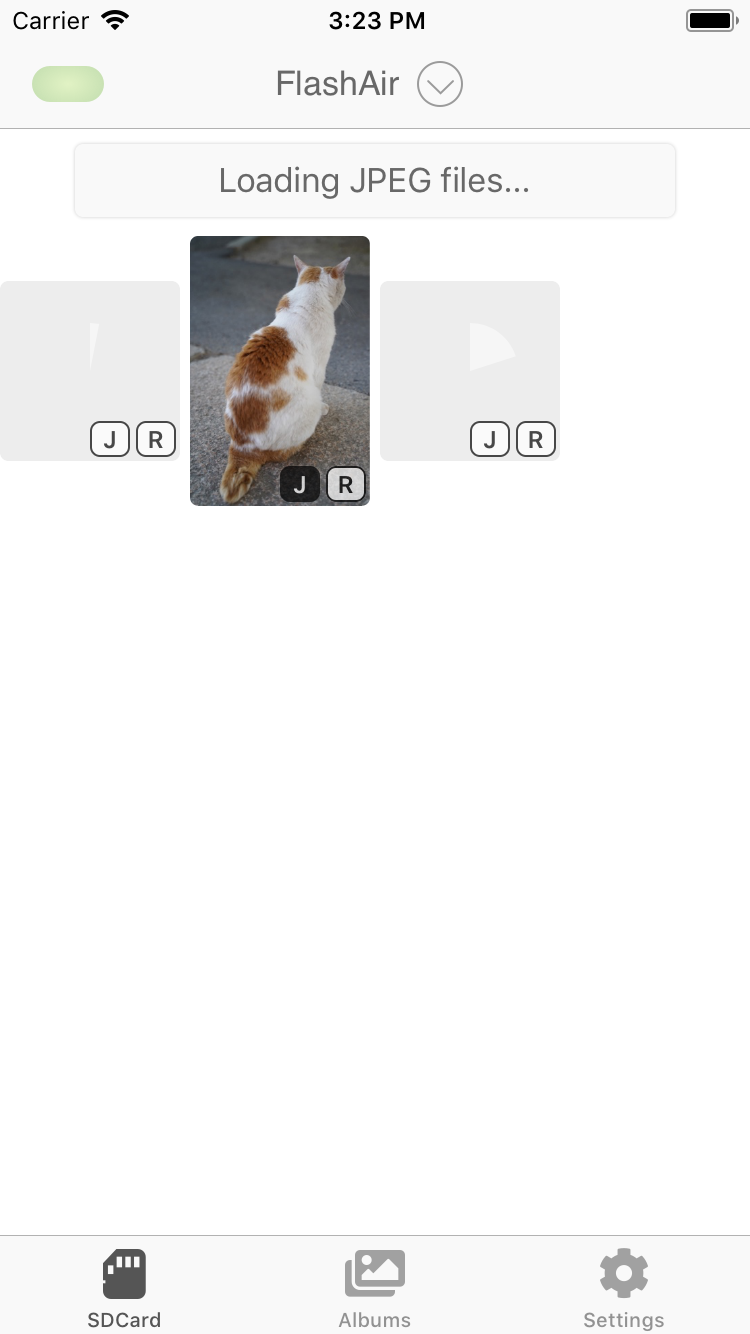
Please insert the FlashAir into the camera and turn it on. In the selection screen of the connection destination, if you select FlashAmir, it is confirmed whether to make a Wifi connection. If you choose to connect, a connection will be made and reading will start if there is a new file. Please open the SDCard tab.

It takes about 10 seconds to connect. Also, you can not connect immediately after turning on FlashAir. When the connection is successful, the green lamp on the upper left of the screen will light up and the download of the file will start. If you can not connect, please check that the FlashAir is turned on and connect again. Open the SDCard tab and pull the screen down to reconnect.